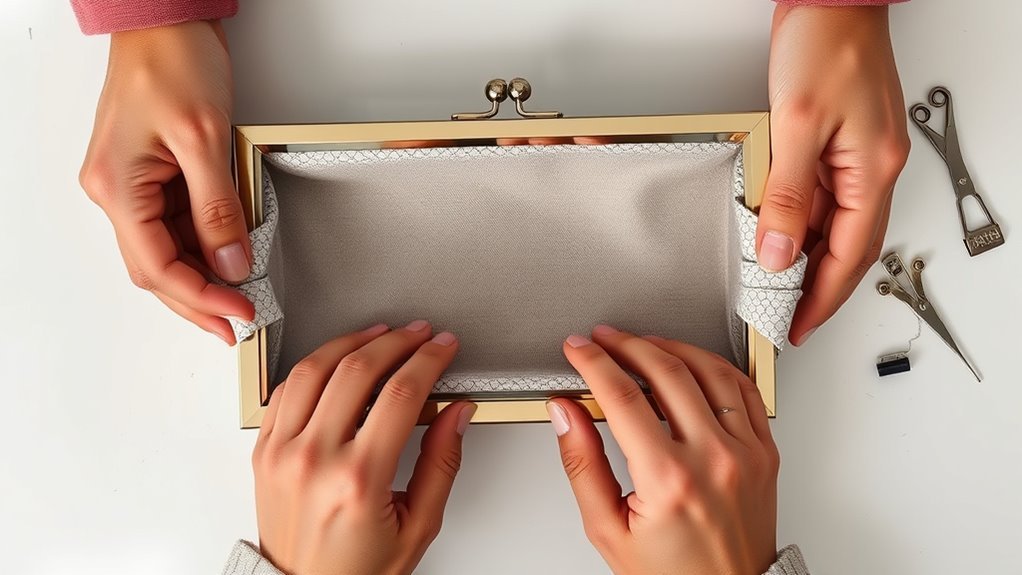
Choose a sturdy 8–12 inch frame, heavy-duty thread, and a strong needle, then draft your pattern from the frame and add 1/2 inch seam allowance. Cut outer fabric, lining, and interfacing to shape, then fuse or sew the interfacing for body. Hand-stitch the lining snugly, smoothing it into the frame before securing it with even tension. Trim bulk for a clean closure, and you’ll soon discover the small details that make the fit exquisite.
Choose the Right Frame and Supplies
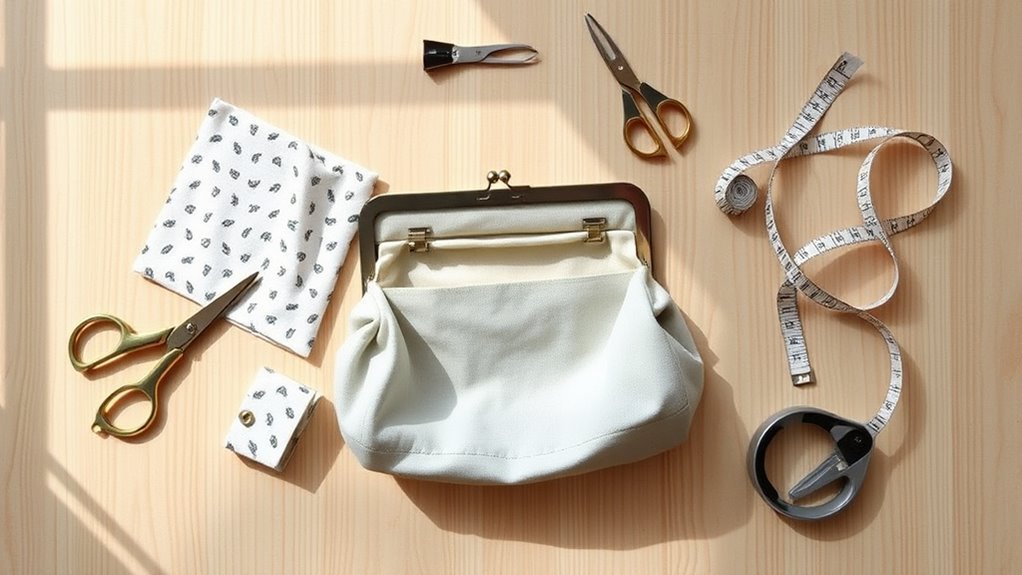
Start with the frame: for a standard clutch, choose one that measures about 8 to 12 inches wide, then match it to the fabric you want to use.
You’ll want frame materials that feel strong yet refined, because your clutch should hold its shape and your edge. Check that the frame suits your fabric choices; if you’re using something light, add interfacing so it won’t sag or drift.
Choose a strong, refined frame that supports your fabric and keeps your clutch crisp and structured.
Gather heavy-duty thread, a sturdy sewing needle, and about 12×24 inches of fabric for both the outer shell and lining.
Pre-punched holes can save you time and make hand-stitching smoother, so look for them if you want an easier build.
You can also choose a frame that leaves room for piping or subtle embellishments, letting you secure the lining while giving your piece a bolder finish.
Draft a Pattern to Fit Your Frame
With your frame and supplies in hand, you can shape the clutch’s silhouette by measuring the frame’s width and height, then factoring in its depth and hinge placement.
In pattern drafting, let your frame measurements guide every line so the bag opens smoothly and closes with poise. Trace the shape onto freezer paper or sturdy paper, and build in at least 0.5 inches of seam allowance for clean seams and confident stitching.
Keep the top edge open where the frame will sit, so the clutch can slip in and lock down without struggle. Mirror the pattern for balance, then cut two pieces for the outer fabric and two for the lining, matching the drafted template exactly.
This isn’t just drafting; it’s designing a vessel that honors your style and lets your hands move freely, with structure that feels intentional, refined, and ready for the next step.
Cut the Outer Fabric and Lining
Lay out your outer fabric and lining, then cut two neat pieces of each, about 12×24 inches, so they mirror your clutch’s shape.
Trace the frame’s outline onto freezer paper, add a 0.5-inch seam allowance, and press it onto the fabric for crisp, exact cutting lines.
For the lining, choose a color that either sings with or slyly contrasts the outer fabric, and keep the top edges aligned for a smooth, secure fit.
Outer Fabric Layout
Measure and cut your outer fabric to about 12 by 24 inches, adding a 0.5-inch seam allowance all around so the frame clutch has clean, forgiving edges. Choose fabric patterns that speak boldly, then place the print so its energy runs true before you cut.
Keep your cuts crisp and your seam allowances even; that precision gives the clutch its polished freedom. Cut two matching lining pieces with the same dimensions, so the inside hugs the exterior without strain.
Press both fabrics flat to erase wrinkles and sharpen the silhouette. When you’re ready, align the outer fabric and lining right sides together, matching edges exactly. That careful layout keeps the structure elegant and sets up a secure, liberated finish.
Lining Piece Cutting
Start by tracing the outer edge of the frame onto freezer paper, then add a 0.5-inch seam allowance so you’ve got a clean cutting guide for both the outer fabric and the lining.
Press your fabric pieces first; smooth cloth gives you truer cuts and keeps fraying in check. For a standard clutch, cut two outer pieces and two lining pieces about 12×24 inches, or match your pattern exactly if your frame runs smaller or larger.
Choose fabric types that support your vision—cotton for structure, satin for sheen, linen for edge. Use sharp cutting techniques, and keep the lining identical to the outer fabric so it slips into the frame with a confident, snug fit.
Your precision now sets the whole clutch free.
Add Interfacing for Structure
To give your frame clutch the crisp, polished body it needs, add interfacing to the wrong side of your fabric pieces before assembling anything. Interfacing gives your clutch backbone, so it holds its elegant shape and moves with confidence.
Explore interfacing types—fusible or sew-in—and choose the one that matches your vision. Lightweight interfacing flatters delicate cloth; heavier support suits sturdier fabrics.
Use these application techniques with care:
- Cut the interfacing to the exact size of each piece.
- Place the adhesive side against the wrong side of the fabric.
- Press with a hot iron until the bond feels secure.
Pre-wash your fabrics first, so shrinkage doesn’t distort your finish later.
When you prepare each layer with intention, you claim both structure and style, giving your frame clutch a clean, liberated silhouette that’s ready to shine.
Sew the Lining for a Snug Fit
Shape the lining to fit the frame with a little breathing room, cutting your fabric 1/4 inch smaller on all sides so the seams won’t crowd the interior. Measure the frame’s inside with care, then choose lightweight lining materials like cotton or polyester so your clutch stays sleek, not stiff.
Mark and sew with exact 1/4 inch seam techniques, letting your stitches run clean and true. Press each seam open as you go; that crisp finish keeps the lining flat and elegant, like a secret that knows its own power.
Use heavy-duty thread if you want the stitching to endure daily motion without surrender. As you work, keep the shape calm and controlled, allowing the fabric to honor the frame’s lines.
When your lining is sewn, it should sit snugly, poised to be held, moved, and carried with confidence.
Insert the Lining Into the Frame
Center the lining inside the frame so its edges sit flush and the shape stays crisp.
Then you’ll hand-stitch it in place, catching the fabric tightly enough that it won’t shift or sag.
Tuck away any exposed seam edges for a clean finish that looks polished from every angle.
Align Lining With Frame
Once you’ve cut your lining a touch larger than the frame’s inner measurements, slip it into place and check that the top edge sits neatly against the frame’s inner lip for a smooth, tailored finish.
Use frame measurement tips to confirm every side meets the metal without strain, then refine with lining alignment techniques until the silhouette feels effortless and exact.
Picture the process like this:
- The fabric rests like a soft banner inside the frame.
- The corners settle cleanly, no puckers, no drift.
- The edge traces the lip with quiet confidence.
If the lining shifts, adjust it now so your clutch opens into freedom, not fuss. A precise fit gives you a polished foundation and keeps the design looking bold, modern, and beautifully unbound.
Secure With Hand Stitches
Tuck the lining fabric inside the frame and ease it into place so it sits evenly along every edge, then hold it with temporary stitches before you commit to the final seam.
These temporary stitches keep the lining from wandering while you work, giving you control and calm. Use hand stitching techniques to make small, disciplined passes around the frame, drawing the fabric snug without distortion.
Then switch to heavy-duty thread for the final securing stitch, letting strength anchor style. As you move, keep the tension balanced and the edge clean.
Once the lining feels locked in, remove the temporary stitches so the interior stays sleek and free. If you want extra flair, add piping or a subtle embellishment to veil any trace.
Finish Hidden Seam Edges
Press the seams open before you insert the lining into the frame so the edges lie flat and the finish stays clean. Your seam finishing should feel deliberate, not fussy. Cut the lining slightly larger than the frame, then use lining techniques that let it nestle in with ease and grace.
- Place the lining inside and check the edge line.
- Baste it temporarily so nothing shifts while you work.
- Finish with heavy-duty thread, then add piping or bias tape to veil raw edges.
This careful build gives your clutch strength and poise, like armor tailored for freedom. As you stitch, keep the fabric smooth and the shape true, so the hidden seams stay quiet, secure, and beautifully contained.
Secure the Frame and Close the Clutch
Now slide the lining fabric neatly into the purse frame, smoothing it so it lies evenly without puckers.
This is the moment where your clutch styles and fabric choices meet precision: pin or baste the lining first, so you can shift the edge if needed before the final hold.
Then stitch around the frame with heavy-duty thread, catching both lining and outer fabric in each firm pass. Keep your tension steady; you want the frame to feel sculpted, not cramped.
Trim away any excess lining inside the frame to release bulk and let the clasp close with ease.
Once everything sits cleanly, remove the temporary stitches and inspect the edge for any last adjustment.
You’re not just fastening a purse—you’re sealing a design that moves with you, light, secure, and unapologetically free.
Frequently Asked Questions
How to Sew a Clutch Bag?
You sew a clutch bag by choosing bold fabric choices, cutting matching panels, stitching them with smart lining techniques, and finishing edges neatly. You’ll secure the frame, press seams, and add flair with beads or piping.
What Is a Purse Frame?
A purse frame is the rigid top structure you use to shape and secure your bag; you’ll find purse frame materials in metal or plastic, with frame bag types ranging from straight to curved.
How Wide to Make a Frame Bag?
Make your frame bag about 8–10 inches wide, or roughly double your frame width, so it blooms with structure and balance. Check frame dimensions, then choose fabric choices that let you move freely and boldly.
Are Envelope Clutches in Style?
Yes, you’ll find envelope clutches are absolutely in style, riding fashion trends with bold clutch materials, sleek lines, and effortless edge. You can wear one to sharpen any look and claim your freedom confidently.
Conclusion
Now you’ve built a frame clutch with a lining that fits as neatly as a key in a lock. By choosing the right materials, shaping your pattern with care, and stitching each layer precisely, you’ve given your clutch both polish and strength. Slip in your essentials, close the frame, and admire the clean finish. With a few thoughtful details, you’ve turned simple fabric into a refined accessory that’s ready to go anywhere.