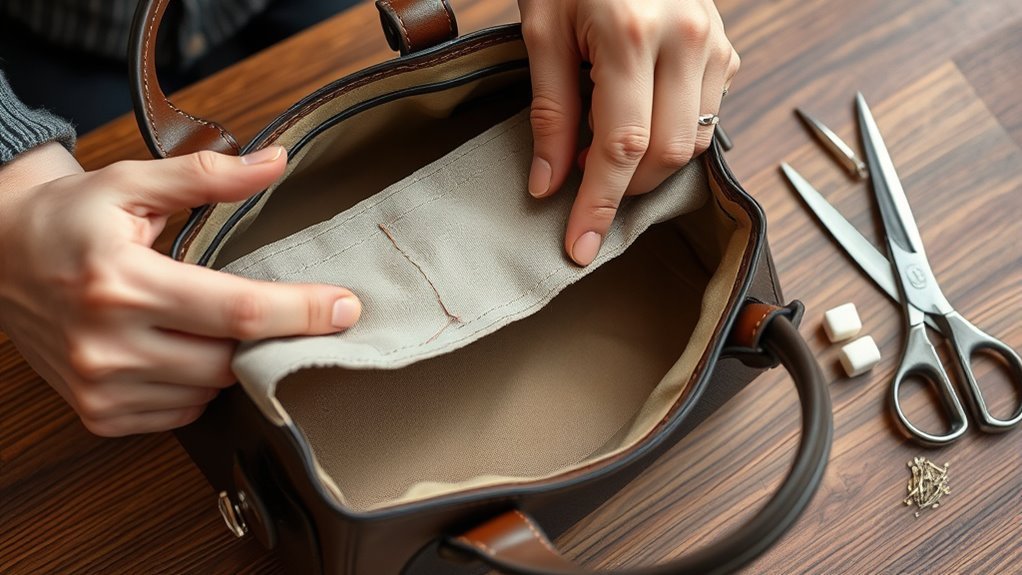
To repair a torn bag lining with a strong, neat patch, empty the bag, trim loose threads from the tear, cut a patch of similar fabric about 1 inch larger than the tear on every side, fold the edges under, pin it over the damage and sew it down with small, even stitches. You can use a little fabric adhesive or fusible web to hold the patch in place while you sew, but the stitches should do the work.
Common Bag Lining Problems
Linings tear at the pockets, along the seams, at the corners and around zipper edges, where stress is greatest. They also fray, stain and pull away from the bag body. A small tear that you fix early stays small, while one that you ignore can grow, and can catch on items in the bag. If the lining is hanging loose or bunching, see why handbag lining bunches up.
Assess the Damage
Empty the bag, turn it so the lining is visible and look closely at the damage. Check whether it is a single tear, a seam that has opened or a larger area that has worn thin. Examine the stitching around it, because if the fabric nearby is also weak, a patch will not hold. Identify the lining material, such as cotton, polyester or satin, since the right patch fabric and thread depend on it. Take a photo or notes, so that you can put the lining back the way that it was.
Tools and Materials
- Fabric for the patch, similar in weight and color to the lining
- Matching thread, and a hand needle or sewing machine
- Sharp scissors and pins or clips
- Fusible web or fabric adhesive, to hold the patch before sewing
- Fray sealant, for raw edges
- An iron and a pressing cloth
Choose the Right Patch Fabric
Choose a fabric that is close to the weight of the original, so that the patch does not pull the lining out of shape. A thicker patch on a thin lining will pucker, and a thin patch will tear again. For a bag that carries liquids or makeup, a tightly woven, wipe-clean fabric is a good choice. Pre-wash the patch if the bag is washable, so that it does not shrink later. If an exact match is hard to find, use a matching color or a contrasting color for a visible repair.
Step-by-Step Repair
- Trim loose threads around the tear, and press the area flat.
- Cut the patch about 1 inch larger than the tear on every side. Round the corners, since square corners lift and fray more easily.
- Fold the raw edges of the patch under by about 1/4 inch, and press them.
- Place the patch over the tear. If the tear is in a seam, slip the patch under the opening, so that it covers the gap from the inside.
- Hold the patch with pins, clips or a thin line of fabric adhesive or fusible web.
- Sew around the patch with small, even stitches, close to the folded edge, using a straight or zigzag stitch. Backstitch at the start and at the end.
- Sew a second row of stitching, or a diagonal cross, in the middle of a larger patch, if the area carries stress.
- Seal any loose edges with fray sealant, and trim the threads.
A sewing machine with a walking foot helps if the lining is slippery. For a hand repair, use a backstitch or a whip stitch, and keep the stitches small. For a related repair on a different material, see how to repair a torn faux leather bag.
Repair a Torn Seam
If the lining has simply come apart at a seam, you may not need a patch at all. Turn the edges in, line them up and sew along the seam with a small ladder stitch, or restitch it with a machine if you can reach it. Reinforce the ends with a few backstitches. For more about seam strength, see how stitch length affects bag seam strength.
Final Touches for a Neat Finish
- Press the patch flat with a pressing cloth, on a heat setting that suits the fabric.
- Check the inside for loose threads, and trim them.
- Run your hand over the area, to feel for lumps or sharp edges that could snag.
- Test the repair by gently pulling on the patch, and filling the bag with a normal load.
Preventing Future Lining Damage
- Do not overload the bag, since strain on the lining and seams is a common cause of tears.
- Keep pens, keys and sharp objects in a case or pouch.
- Clean the interior regularly, to remove grit that wears the fabric.
- Reinforce stress points, such as the corners and pockets, with extra stitching.
- Store the bag in a cool, dry place, stuffed lightly. See how to store handbags.
When to Replace the Whole Lining
If the lining is worn through in many places, or the fabric is rotten or damp-damaged, patching will not last. In that case, it is better to make a new lining, using the old one as a pattern. This takes more time, but gives a better result. A good tailor or a bag repair service can do this if you prefer. For other fabric repairs, how to patch a canvas tote bag shows a similar technique.
Frequently Asked Questions
How Do I Patch a Hole in a Backpack?
Clean the area, trim loose threads, cut a patch larger than the hole and sew it on, from the inside if you can reach it. Use strong thread and sew around the patch twice.
Can a Purse Be Relined?
Yes. A new lining can be sewn using the old lining as a pattern, or by a tailor or bag repair service.
How Do I Patch a Torn Bag?
Choose a patch fabric of a similar weight, cut it larger than the tear and sew it on with strong thread, reinforcing the edges.
Conclusion
A torn lining is a simple repair when you choose a suitable fabric, make the patch larger than the tear and sew it with small stitches. Fix tears early, reinforce stress points and avoid overloading the bag, and the lining will last.